I recently had a website performance problem. A website that I inherited was getting about 1,200 page views and 500 unique visitors per day. While this is not a lot of traffic, each page request resulted in over 104 SQL queries to the database as well as another 109 hits for static resources which resulted in either 200 or 304 HTTP responses. The result was that the website frequently went down due to what the hosting company refers to as high resource usage.
To fix this, I first took some recordings of CPU, Memory, and MySQL procs from cPanel’s Resource Usage Stats for comparison later. Then I introduced a caching plugin to bypass the 104 SQL queries on every page request. I also configured a HTTP expires headers for all the static content served from origin with various expirations based on asset type. For serving the static assets, I recommended using a CDN. Finally, I enabled page compression to reduce bandwidth for text based static content served from origin. The result of these four configuration changes was average daily performance improvement as follows.
- CPU Usage before: 3.74%
- CPU Usage after: 0.97%
- MEM Usage before: 0.68%
- MEM Usage after: 0.10%
- MySQL Procs before: 0.28%
- MySQL Procs after: 0.13%
In the remaining article, I will highlight the technical configurations which I made to improve the website’s performance.
Setting up CloudFlare
To configure CloudFlare as a reverse proxy for serving your static content and page rule caching, you will need to change the domain name servers of your domain to those specified by your CloudFlare account. What happens is when a user goes to your website by typing in yourwebsite.com, their web browser will contact CloudFlare’s name servers and resolve yourwebsite.com to CloudFlare’s closest server to serve any static content. Anything not cached by CloudFlare will fallback to contacting the origin server at your hosting company’s server. Some hosting companies allow you to change name servers from their admin panel. If not, then you can try logging in here to change name servers, https://manage.opensrs.net/ You will need to get credentials from your hosting company. Note that this DNS name server change will take 24 – 48 hours to complete. To verify, that this switch has completed. You can ping yourdomain.com and verify that the ip address displayed is of CloudFlare’s. On the CloudFlare side, turn on Web Application Firewall under Security Settings. This tool blocks malicious traffic from coming to your origin server. Under Performance Settings, I selected ‘Aggressive’ caching level. Set Minimum expire TTL to 1 month, and auto minify js, css, and html. To use page caching, follow the instructions on this blog page.
To test if CloudFlare is serving your content, from a terminal, run this command which will retrieve the headers of the page/asset.
curl -I www.yourdomain.com
Look for CF headers which are inserted by CloudFlare’s servers.
Expires: Fri, 29 Aug 2014 06:47:08 GMT
Cache-Control: public, max-age=2678400
Pragma: no-cache Vary:
Accept-Encoding,Cookie,User-Agent
CF-Cache-Status: HIT
Setting up WP Super Cache
WP Super Cache works by storing static HTML pages of your website as users access those pages. The cache is stored under the wp-content folder of your WordPress installation. All pages are cached except those specified under the exclusion section in the cache configuration. When a user requests a page, the caching plugin first checks to see if the requested page is under the exclusion rule, if not, then it will try to fetch a cached copy of the static HTML to serve to the user. If the static HTML does not exist, then it will generate one and put the current timestamp on it as using html comments. The next time a user requests this same page, the cached static html will be served. If the requested page is under the exclusion rules configuration, WP Super Cache will not cache or serve from the cache, it will allow the WordPress engine to generate the page. This will result in database calls.
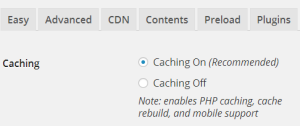
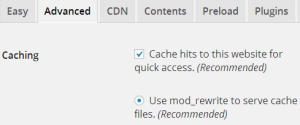
Under the Easy tab of the WP Super Cache configuration settings, turn on caching.
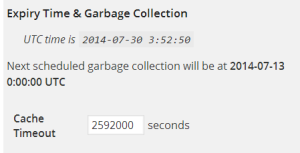
Also set the scheduler to check daily for expiration.
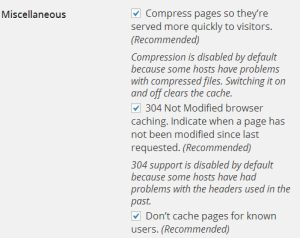
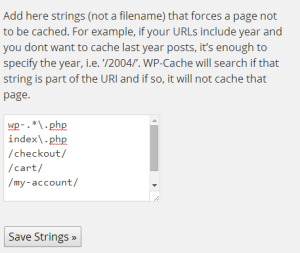
Make sure that the wp-* pages are not cached. These are admin pages.
To test if caching works on your website, you can first view if static HTML pages are being generated in the cache folder. Next, temporarily unlink your WordPress site from the database by entering an invalid host in the wp-config.php file. E.g.,
/** MySQL hostname */ define('DB_HOST', 'xyz');
Next, go visit a page that exists in the cache and verify that the page loads from your web browser. This way, you can be sure that the page loaded without database calls. After this test, you can revert the wp-config.php change. If you enabled debug mode in the WP Super Cache plugin, it will write a log to the root of the cache folder. You can inspect this file to see if there were any errors if static cache files are not being generated. Lastly, as an alternative to unlinking the website from the database, you can use MySQL Proxy to log all database activity between your website and the database. This will tell you if a certain page request resulted in database calls. This technique will require shell access from your hosting company. Click here to see the tutorial on how to use MySQL Proxy.
Setting up Expires header for static content
To set an expires header for various common static content, you can add these to your .htaccess file. This will set most common graphics, audio, and video to expire 365 days since last access. Javascript and css to expire in 30 days.
# BEGIN Expires
<ifModule mod_expires.c>
ExpiresActive On
ExpiresByType image/gif A31536000
ExpiresByType image/jpeg A31536000
ExpiresByType image/jpg A31536000
ExpiresByType image/png A31536000
ExpiresByType image/bmp A31536000
ExpiresByType image/tiff A31536000
ExpiresByType image/x-icon A31536000
ExpiresByType audio/midi A31536000
ExpiresByType audio/mpeg A31536000
ExpiresByType audio/x-wav A31536000
ExpiresByType video/mpeg A31536000
ExpiresByType video/quicktime A31536000
ExpiresByType video/x-msvideo A31536000
ExpiresByType video/x-sgi-movie A31536000
ExpiresByType text/css A2592000
ExpiresByType text/javascript A2592000
ExpiresByType application/x-javascript A2592000
</ifModule>
# END Expires
Notes:
- If your website has SSL, then you will need to go with the CloudFlare Pro level plan.
- Due to the 20 Page rules limitation for the CloudFlare Pro plan. I decided not to use their Page rule feature to cache the whole website.
- I find CloudFlare’s page views and unique visitors counts to be accurate since all requests to your website will first go through the CloudFlare’s server. Compared to Google Analytics which uses javascript to callback to Google’s server. The difference is if the user does not have javascript turned on in their web client, then Google will not be able to register the page view. You can view the page view statistics from CloudFlare’s Analytics page.
- You will need to monitor your website’s resource usage over the next few days to see how much performance improves and adjust cache / cdn settings if necessary.
- Your web server must be Apache for the Expires header example to work.
- The performance improvements are based on daily average usage as reported by cPanel’s Resource Usage Stats tool before and after.
- For websites without user accounts and user login functionality, it may be possible to simply use CloudFlare’s Page Rule caching.


